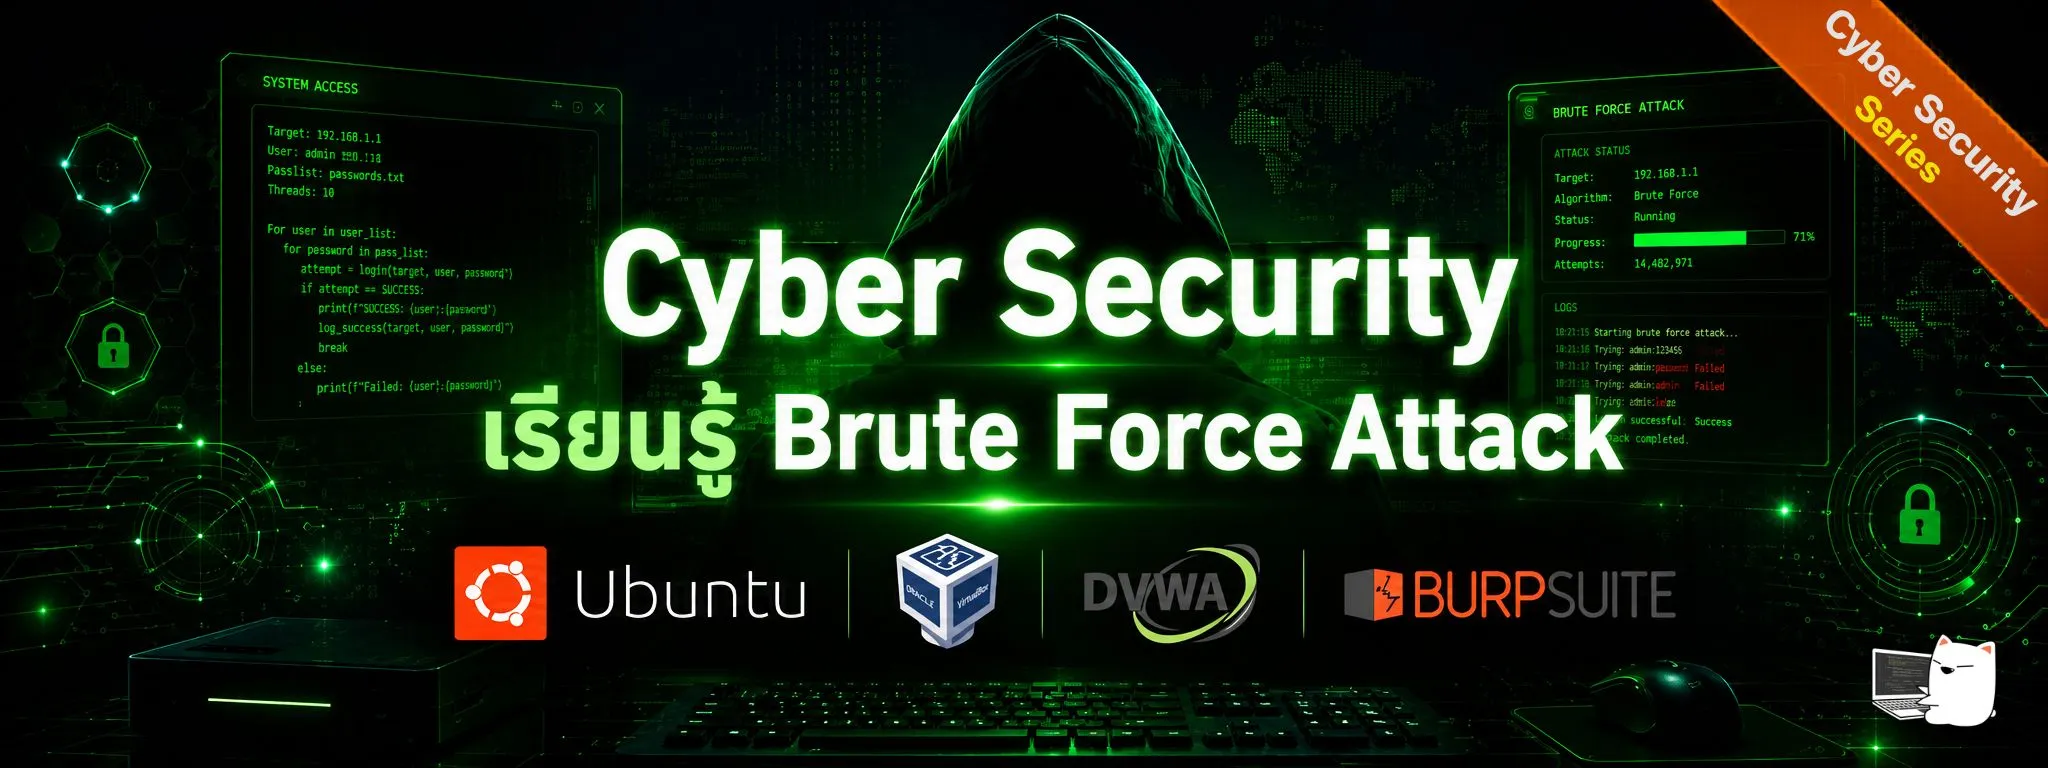
Cyber Security: เรียนรู้ Brute Force Attack
เรียนรู้เทคนิค Brute Force Attack และแนวทางป้องกันผ่านการฝึกปฏิบัติจริงด้วย DVWA และ Burp Suite
1. แนะนำ Brute Force Attack#
ยินดีต้อนรับสู่ ห้องปฏิบัติการ Brute Force Attack!
บทความนี้จะพาไปเรียนรู้หนึ่งในเทคนิคการโจมตี web application ที่พบได้บ่อยและเป็นพื้นฐานสำคัญของงานด้าน cybersecurity
ข้อกำหนดเบื้องต้น#
ก่อนเริ่มห้องปฏิบัติการนี้ ควรมี:
- ✅ ติดตั้ง Ubuntu VM - ติดตั้ง Ubuntu บน VirtualBox เรียบร้อยแล้ว
- ✅ พื้นฐานคำสั่ง Linux - สามารถใช้งาน terminal เบื้องต้นได้
- ✅ ความรู้เรื่อง SSH - เข้าใจการเชื่อมต่อเข้าสู่ VM จากระยะไกล
📚 หากยังใหม่กับ Linux: สามารถศึกษาการติดตั้ง Ubuntu VM และพื้นฐาน command-line ได้จาก Linux Security Lab Tutorial ↗
Brute Force Attack คืออะไร?#
Brute Force Attack คือการโจมตีแบบลองค่าซ้ำ ๆ เพื่อค้นหาข้อมูลสำคัญ เช่น รหัสผ่าน หรือ PIN โดยจะทดลองค่าที่เป็นไปได้ทั้งหมดอย่างต่อเนื่องจนกว่าจะพบค่าที่ถูกต้อง
Password attempts in a brute force attack:
password1 → ผิด
password123 → ผิด
admin123 → ผิด
letmein → ผิด
password → ✓ สำเร็จBrute Force Attack ทำงานอย่างไร#

ตัวอย่างเวลาในการถอดรหัส#
| ความซับซ้อนของรหัสผ่าน | จำนวนตัวอักษร | เวลาในการถอดรหัส (1000 ครั้ง/วินาที) |
|---|---|---|
1234 | 4 ตัวเลข | ~10 วินาที |
password | 8 ตัวพิมพ์เล็ก | ~2 ชั่วโมง |
Password1 | 8 ผสม | ~3 วัน |
P@ssw0rd! | 8 พร้อมสัญลักษณ์ | ~5 เดือน |
MySecur3P@ss! | 14 พร้อมสัญลักษณ์ | ~400 ล้านปี |
ข้อควรรู้: ความยาวและความซับซ้อนของรหัสผ่านมีผลอย่างมากต่อระยะเวลาในการถอดรหัส
2. ประเภทของ Brute Force Attack#
Simple Brute Force#
เป็นการทดลองทุกความเป็นไปได้ของรหัสผ่านอย่างเป็นระบบ
a, b, c, ..., z
aa, ab, ac, ..., zz
aaa, aab, aac, ...ข้อดี: มีโอกาสพบรหัสผ่านได้แน่นอนหากใช้เวลามากพอ ข้อเสีย: ใช้เวลานานมากเมื่อรหัสผ่านมีความซับซ้อนสูง
Dictionary Attack#
ใช้รายการรหัสผ่านยอดนิยม หรือ wordlist ในการโจมตี
# ตัวอย่างรายการรหัสผ่านทั่วไป:
password
123456
admin
qwerty
letmein
welcomeข้อดี: เร็วกว่า simple brute force ข้อเสีย: มีประสิทธิภาพเฉพาะกับรหัสผ่านที่คาดเดาได้ง่าย
Hybrid Attack#
นำคำจาก dictionary มาผสมกับรูปแบบต่าง ๆ
password → password1, password123, password!
admin → admin1, Admin2024, admin@2024ข้อดี: มีประสิทธิภาพกับรหัสผ่านที่นิยมดัดแปลง ข้อเสีย: ยังคงต้องใช้เวลาและทรัพยากรในการประมวลผล
Credential Stuffing#
ใช้ username/password ที่รั่วไหลจาก data breach มาทดลองเข้าสู่ระบบอื่น
ข้อดี: มีโอกาสสำเร็จสูง หากมีการใช้รหัสผ่านซ้ำ ข้อเสีย: ต้องอาศัยข้อมูลจากฐานข้อมูลที่รั่วไหล
3. การป้องกัน Brute Force Attack#
กลยุทธ์การป้องกัน#

เทคนิคการป้องกัน#
1. ใช้รหัสผ่านที่แข็งแกร่งและซับซ้อน#
รหัสผ่านที่ดีควรมีลักษณะดังนี้:
- ยาว: อย่างน้อย 12-16 ตัวอักษร
- หลากหลาย: มีทั้งตัวพิมพ์ใหญ่ ตัวพิมพ์เล็ก ตัวเลข และสัญลักษณ์
- ไม่ซ้ำกัน: ใช้รหัสผ่านต่างกันในแต่ละบัญชี
- คาดเดายาก: หลีกเลี่ยงคำทั่วไปหรือรูปแบบที่เดาได้ง่าย
❌ ไม่ดี:     password123
❌ ไม่ดี:     admin2024
❌ ไม่ดี:     qwerty123

✅ ดี:         Tr0ub4dor&3Horse!
✅ ดีกว่า:    correct-horse-battery-staple
✅ ดีที่สุด: ใช้งาน password manager2. จำกัดจำนวนครั้งในการ Login#
กำหนดจำนวนครั้งที่สามารถ login ผิดพลาดได้ภายในช่วงเวลาหนึ่ง
# ตัวอย่าง rate limiting logic
if failed_attempts > 5:
    block_ip_address()
wait_time = 2^failed_attempts # Exponential backoffแนวทางที่นิยมใช้:
- เพิ่มเวลาหน่วงระหว่างการ login
- บล็อก IP ชั่วคราวหลัง login ผิดหลายครั้ง
- แสดง CAPTCHA
- ใช้ exponential backoff เช่น 1s, 2s, 4s, 8s
3. เปิดใช้งาน Two-Factor Authentication (2FA)#
เพิ่มขั้นตอนการยืนยันตัวตนนอกเหนือจากรหัสผ่าน
ปัจจัยที่ 1: สิ่งที่รู้       → รหัสผ่าน
ปัจจัยที่ 2: สิ่งที่มี       → โทรศัพท์ หรือ Token
ปัจจัยที่ 3: สิ่งที่เป็น → Biometricตัวอย่างวิธีการ 2FA:
- SMS OTP
- Authentication App
- Hardware Token
- Biometric Verification
4. นโยบายการล็อคบัญชี#
ล็อคบัญชีชั่วคราวเมื่อมีการ login ผิดซ้ำหลายครั้ง
| การพยายามล้มเหลว | การดำเนินการ |
|---|---|
| 3-5 | แจ้งเตือน + หน่วงเวลา |
| 5-10 | ล็อคชั่วคราว (15-30 นาที) |
| 10+ | ล็อคนานขึ้น + แจ้งผู้ดูแลระบบ |
คำเตือน: หากตั้งค่าระบบล็อคบัญชีไม่เหมาะสม อาจถูกใช้เป็นช่องทางในการทำ DoS ได้
5. ตรวจสอบและแจ้งเตือน#
บันทึกกิจกรรมที่ผิดปกติและแจ้งเตือนผู้ดูแลระบบ
# ตัวอย่างเหตุการณ์ที่ควรแจ้งเตือน
- Login ล้มเหลวหลายครั้งจาก IP เดียวกัน
- Login จากตำแหน่งที่ผิดปกติ
- Login ในช่วงเวลาที่ไม่ปกติ
- Login พร้อมกันจากหลาย IP4. Lab Setup - DVWA Installation#
ในส่วนนี้จะเป็นการตั้งค่าห้องปฏิบัติการด้วย DVWA (Damn Vulnerable Web Application) ซึ่งเป็น web application ที่ถูกออกแบบมาเพื่อการฝึกด้าน cybersecurity โดยเฉพาะ
ข้อกำหนดเบื้องต้น#
- Ubuntu Linux VM จากบทก่อนหน้า
- Firefox browser บน Ubuntu
- การเชื่อมต่ออินเทอร์เน็ตภายใน VM
Exercise 4: เริ่มต้น Ubuntu VM#
ภายใน VirtualBox ให้ดับเบิลคลิกที่ Ubuntu Linux VM เพื่อเริ่มต้นระบบ
SSH Access สำหรับการคัดลอกคำสั่งที่สะดวกขึ้น#
💡 Pro Tip: การเชื่อมต่อผ่าน SSH ช่วยให้สามารถ copy-paste คำสั่งจากบทความเข้าสู่ VM ได้สะดวกกว่าการพิมพ์เองทั้งหมด
เหตุผลที่ควรใช้ SSH#
ระหว่างอ่านบทความและใช้งาน terminal บน VM อาจต้องสลับหน้าต่างอยู่ตลอดเวลา การใช้ SSH ช่วยให้สามารถเปิดบทความบน host machine และรันคำสั่งใน Ubuntu VM ได้โดยตรง

ข้อดีของ SSH
- ✅ คัดลอกคำสั่งจาก browser ได้โดยตรง
- ✅ อ่านบทความบนหน้าจอหลักได้สะดวกกว่า
- ✅ แยก browser และ terminal ออกจากกันชัดเจน
- ✅ ลดการสลับหน้าต่าง VM ไปมา
ตรวจสอบ SSH Access#
ตรวจสอบว่า SSH service ทำงานอยู่:
sudo service ssh statusผลลัพธ์ที่คาดหวัง:
● ssh.service - OpenBSD Secure Shell server
     Loaded: loaded (/usr/systemd/system/ssh.service; enabled)
Active: active (running)หากยังไม่ทำงาน:
sudo service ssh startเปิดใช้งาน SSH ให้เริ่มอัตโนมัติ:
sudo systemctl enable sshเชื่อมต่อจาก Host Machine#
Windows (Command Prompt หรือ PowerShell):
ssh -p 2222 your_username@localhostmacOS หรือ Linux:
ssh -p 2222 your_username@localhostแทนที่ your_username ด้วย username ของ Ubuntu
เมื่อเชื่อมต่อสำเร็จ prompt จะเปลี่ยนเป็น:
your_username@your_hostname:~$
Quick SSH Reference#
| Task | Command |
|---|---|
| Connect to VM | ssh -p 2222 user@localhost |
| Exit SSH session | exit หรือ Ctrl + D |
| Copy from browser | Highlight text + Ctrl + C |
| Paste in terminal | Ctrl + Shift + V หรือ right-click paste |
ทดสอบ SSH Connection#
pwd
whoami
uname -aผลลัพธ์ที่คาดหวัง:
/home/your_username
your_username
Linux your_hostname 6.5.0-... #ubuntu SMP ...
🎯 หลังจากนี้สามารถคัดลอกคำสั่งจากบทความไปรันบน terminal ผ่าน SSH ได้โดยตรง
Exercise 6: เข้าถึง DVWA#
หา IP Address ของ VM#
ติดตั้ง net-tools ก่อน (สำหรับใช้งาน ifconfig)
sudo apt install net-tools -yตรวจสอบ IP address:
ifconfigจะพบ IP address ลักษณะเช่น 10.0.2.15 หรือ 192.168.56.x

เปิด Firefox บน Ubuntu และไปที่:
http://10.0.2.15/dvwa/setup.phpNote: หาก IP address ไม่ตรงกับตัวอย่าง ให้แทนที่ด้วย IP จริงของ VM หรือใช้
http://localhost/dvwa/setup.phpเมื่อทำงานภายใน VM
คลิกปุ่ม “Create / Reset Database” DVWA จะสร้าง database tables และเพิ่มข้อมูลตัวอย่างให้อัตโนมัติ

Note: หากเกิด error ให้ตรวจสอบว่า database credentials ใน
config.inc.phpตรงกับข้อมูลของ MySQL user ที่สร้างไว้
Login เข้าสู่ DVWA#
URL: http://10.0.2.15/dvwa/login.php
Username: admin
Password: passwordNote: ใช้ IP address จริงของ VM แทน
10.0.2.15หากแตกต่างจากตัวอย่าง


5. การเข้าใจ Brute Force Vulnerability#
Exercise 7: สำรวจ DVWA Brute Force Module#
ไปที่:
http://10.0.2.15/dvwa/security.phpตั้งค่า security level เป็น Low แล้วคลิก Submit

Note: DVWA มีหลายระดับความปลอดภัย เช่น Low, Medium, High และ Impossible โดยระดับ Low เหมาะสำหรับการเรียนรู้ เพราะมี security controls น้อย ทำให้เข้าใจขั้นตอนของ brute force attack ได้ง่ายขึ้น
จากนั้นไปที่:
http://10.0.2.15/dvwa/vulnerabilities/brute/Note: หาก IP address แตกต่างจากตัวอย่าง ให้เปลี่ยนเป็น IP จริงของ VM
ทดลอง Login#
ลองเข้าสู่ระบบด้วยข้อมูลที่ถูกต้อง:
Username: admin
Password: passwordระบบควรแสดงข้อความ login สำเร็จ
จากนั้น logout และทดลองใช้รหัสผ่านที่ไม่ถูกต้อง:
Username: admin
Password: wrongpassสังเกต URL#
http://10.0.2.15/dvwa/vulnerabilities/brute/?username=admin&password=wrongpass&Login=LoginNote: URL จะเปลี่ยนตาม IP address ของ VM ที่ใช้งานจริง
จุดสังเกตสำคัญ#
ข้อมูล username และ password ถูกส่งผ่าน GET request ผ่าน URL query parameters ทำให้สามารถ intercept และแก้ไข request ได้ง่าย
การเข้าใจ GET และ POST#
| Method | วิธีส่งข้อมูล | ความปลอดภัย | การมองเห็น |
|---|---|---|---|
| GET | ส่งผ่าน URL query parameters | ปลอดภัยน้อยกว่า | มองเห็นได้ใน URL, browser history และ logs |
| POST | ส่งผ่าน request body | ปลอดภัยกว่า | ไม่แสดงใน URL |
# GET Request (DVWA Low ใช้วิธีนี้)
GET /dvwa/vulnerabilities/brute/?username=admin&password=wrongpass HTTP/1.1

# POST Request (ปลอดภัยกว่า)
POST /dvwa/vulnerabilities/brute/ HTTP/1.1
Content-Type: application/x-www-form-urlencoded

username=admin&password=wrongpass6. การติดตั้ง Burp Suite Community Edition#
Burp Suite เป็น interception proxy ที่นิยมใช้สำหรับทดสอบความปลอดภัยของ web application
Exercise 8: ดาวน์โหลด Burp Suite#
เปิด Firefox บน Ubuntu และไปที่:
https://portswigger.net/burp/communitydownloadดาวน์โหลดเวอร์ชัน Linux (shell script)
Exercise 9: ติดตั้ง Burp Suite#
ไปยังโฟลเดอร์ Downloads:
cd ~/Downloads
ls -l burp*กำหนดสิทธิ์ให้ installer สามารถ execute ได้:
sudo chmod +x burpsuite_community_*.shรัน installer:
./burpsuite_community_*.shทำตามขั้นตอนใน installation wizard จนเสร็จสมบูรณ์
Exercise 10: เปิด Burp Suite#
วิธีที่ 1: เปิดผ่าน Ubuntu Applications#
- คลิก Show Applications
- พิมพ์
Burp Suite - คลิกเพื่อเปิดโปรแกรม

วิธีที่ 2: เปิดผ่าน Command Line#
cd /opt/BurpSuiteCommunity
./burpsuiteInitial Setup Wizard#
- คลิก Next หรือ Start Burp
- เลือก Use Burp defaults
- คลิก Start Burp
จะเข้าสู่หน้า dashboard ของ Burp Suite

Exercise 11: ตั้งค่า Firefox Proxy#
เปิด Firefox แล้วไปที่:
Settings → Network Settings → Settingsเลือก Manual proxy configuration และกำหนดค่า:
HTTP Proxy: 127.0.0.1
Port: 8080ติ๊กเลือก:
Use this proxy for all protocolsแล้วคลิก OK

ตรวจสอบ Burp Suite Proxy#
ใน Burp Suite ไปที่:
Proxy → Proxy settings → Proxyตรวจสอบว่า:
- Interface:
127.0.0.1 - Port:
8080 - Running: ✓

Exercise 12: ติดตั้ง Burp Suite CA Certificate#
เหตุผลที่ต้องติดตั้ง#
Burp Suite จำเป็นต้อง intercept HTTPS traffic จึงต้องมี trusted certificate
ดาวน์โหลด CA Certificate#
เปิด Firefox แล้วไปที่:
http://burp- คลิก CA Certificate
- บันทึกไฟล์ชื่อ
cacert.der

นำเข้า Certificate#
ไปที่:
Settings → Privacy & Security → Certificates- คลิก View Certificates
- ไปที่แท็บ Authorities
- คลิก Import
- เลือกไฟล์
cacert.der - ติ๊ก Trust this CA to identify websites
- คลิก OK

7. การ Intercept Requests ด้วย Burp Suite#
⚠️ ก่อนเริ่ม: ตรวจสอบว่า DVWA security level ถูกตั้งเป็น Low แล้ว
Exercise 13: เปิดใช้งาน Intercept Mode#
ใน Burp Suite:
- ไปที่แท็บ Proxy
- เปิดแท็บย่อย Intercept
- คลิกปุ่ม Intercept is on
เมื่อเปิดใช้งาน Burp จะ intercept requests ทั้งหมดจาก Firefox
Exercise 14: Intercept DVWA Login#
เมื่อเปิด Intercept แล้ว:
-
เปิด DVWA Brute Force page
-
ทดลอง login ด้วย:
- Username:
admin - Password:
test123
- Username:
Firefox จะดูเหมือนค้าง ซึ่งเป็นพฤติกรรมปกติ
ตรวจสอบใน Burp Suite#
Burp จะแสดง intercepted request:
GET /dvwa/vulnerabilities/brute/?username=admin&password=test123&Login=Login HTTP/1.1
Host: localhost
User-Agent: Mozilla/5.0 ...
Accept: text/html,application/xhtml+xml...การทำงานของ Intercept#
| Action | Keyboard Shortcut | Result |
|---|---|---|
| Forward | Ctrl + F | ส่ง request ไปยัง server |
| Drop | Ctrl + D | ยกเลิก request |
| Intercept | Ctrl + I | เปิด/ปิด intercept |
ทดลองคลิก Forward เพื่อส่ง request ไปยัง DVWA

Exercise 15: ตรวจสอบ HTTP History#
ใน Burp Suite ไปที่:
Proxy → HTTP Historyเลือก request ที่เกี่ยวข้องกับ DVWA login
สังเกตโครงสร้าง Request#
Request Line:
GET /dvwa/vulnerabilities/brute/?username=admin&password=test123&Login=Login

Headers:
Host: localhost
User-Agent: Mozilla/5.0...
Accept: text/html...

GET Parameters:
username = admin
password = test123
Login = Loginตรวจสอบ Response#
ในแท็บ Response จะพบข้อความ:
<pre><br />
Username and/or password incorrect.<br /><br /></pre>
ข้อความนี้คือ response ที่ server ส่งกลับเมื่อ login ไม่สำเร็จ
8. Automated Brute Force ด้วย Burp Intruder#
Exercise 16: ส่ง Request ไปยัง Intruder#
จาก HTTP History:
- คลิกขวาที่ DVWA login request
- เลือก Send to Intruder
จากนั้นไปที่แท็บ Intruder
Exercise 17: ตั้งค่า Attack Position#
ในแท็บ Positions
- คลิก Clear §
- Highlight เฉพาะค่า password
- คลิก Add §

Request จะมีลักษณะดังนี้:
...username=admin&password=§test123§&Login=Loginสัญลักษณ์ § แสดงตำแหน่งที่ Burp จะใส่ payload ระหว่าง attack
Exercise 18: ตั้งค่า Payloads#
ไปที่แท็บ Payloads
เลือก:
Payload type: Simple listเพิ่มรายการรหัสผ่านตัวอย่าง:
password
admin
123456
qwerty
letmein
welcome
admin123
password123
Exercise 19: ตั้งค่า Attack Settings#
ในแท็บ Settings
ตั้งค่า:
Attack type: SniperGrep - Extract#
- คลิก Add
- Highlight คำว่า
incorrect
Grep - Match#
- คลิก Add
- เพิ่มคำว่า:
incorrect
Exercise 20: เริ่ม Attack#
คลิกปุ่ม Start attack
Burp จะแสดงผลลัพธ์ในหน้าต่างใหม่:
| Payload # | Payload | Status | Length | Error |
|---|---|---|---|---|
| 1 | password | 200 | 4874 | None |
| 2 | admin | 200 | 5120 | None |
| 3 | 123456 | 200 | 4874 | None |

จุดสังเกตสำคัญ#
- Status 200 หมายถึง server ตอบกลับสำเร็จ
- Length แตกต่างกัน อาจบ่งบอกถึง response ที่ต่างออกไป
- Payload ที่มี response length แตกต่าง มักเป็น candidate ของรหัสผ่านที่ถูกต้อง
Exercise 21: วิเคราะห์ Results#
ในหน้าต่าง attack results:
- คลิกคอลัมน์ Length
- มองหา response ที่มีขนาดแตกต่างจากรายการอื่น
- ตรวจสอบ payload ที่ไม่มีคำว่า
incorrect
หากพบ payload ที่ผิดปกติ ลอง login ด้วยตนเอง:
Username: admin
Password: password9. Dictionary Attack ด้วย Password Lists#
Exercise 22: ดาวน์โหลด Password Wordlist#
ใน Ubuntu terminal:
cd ~/Downloadsดาวน์โหลด password list:
wget https://raw.githubusercontent.com/openwall/john/bleeding-jumbo/run/password.lst -O passwords.txtหรือใช้งาน SecLists:
git clone https://github.com/danielmiessler/SecLists.gitตัวอย่างไฟล์ password list:
Passwords/Common-Credentials/10-million-password-list-top-1000.txtPasswords/Software/dragonfly41-top10k.txt
Exercise 23: โหลด Wordlist ลงใน Burp#
ใน Burp Suite:
- ไปที่แท็บ Payloads
- คลิก Load…
- เลือกไฟล์
passwords.txt
Burp จะโหลดรายการรหัสผ่านเข้าสู่ payload list
Exercise 24: รัน Dictionary Attack#
ในแท็บ Settings
กำหนดค่า:
Request Engine threads: 1-5
Attack type: Sniperจากนั้นเริ่ม attack
Exercise 25: กรองและวิเคราะห์ผลลัพธ์#
กรองตาม Response Length#
- คลิกคอลัมน์ Length
- มองหา outlier
กรองตาม Keyword#
เพิ่ม Grep - Match เช่น:
Welcome
incorrectResponse ที่ไม่มีคำว่า incorrect มักหมายถึง login สำเร็จ
ผลลัพธ์ที่คาดหวัง#
รายการที่ login สำเร็จมักมี:
- Response length แตกต่าง
- ไม่มีข้อความ
incorrect - อาจมีข้อความ welcome หรือ redirect ไปยังหน้าอื่น
10. เทคนิคการวิเคราะห์ขั้นสูง#
การวิเคราะห์ Response Length#
Response length ที่แตกต่างกันสามารถบ่งบอกผลลัพธ์ที่แตกต่างกันได้
| Response | Length | ความหมาย |
|---|---|---|
| ~4800 bytes | Base length | Login ไม่สำเร็จ |
| ~5100 bytes | Different length | Login สำเร็จ |
การใช้งาน Grep - Extract เพื่อกรองข้อมูลอย่างแม่นยำ#
ใช้สำหรับ extract ข้อมูลเฉพาะจาก responses
ขั้นตอนการตั้งค่า#
- ไปที่ Settings → Grep - Extract → Add
- Highlight ข้อความที่ต้องการ extract เช่น
incorrect - กำหนด start และ end markers
- Burp จะแสดงค่าที่ extract ได้ในคอลัมน์ใหม่
ตัวอย่าง#
Extract: "incorrect"
Result: แสดง flag ในคอลัมน์ "incorrect"ประเภทของ Burp Intruder Attacks#
| Type | คำอธิบาย | Use Case |
|---|---|---|
| Sniper | ใช้ payload เดียวกับหลายตำแหน่ง | Single field brute force |
| Battering Ram | ใช้ payload เดียวกันทุกตำแหน่ง | ทดสอบค่าเดียวหลาย field |
| Pitchfork | ใช้ payload หลายชุดแบบจับคู่กัน | Username + password combinations |
| Cluster Bomb | ทดสอบทุก combination ที่เป็นไปได้ | Cartesian product testing |
11. เปรียบเทียบ DVWA Security Levels#
Low Security#
// No protection
if( isset( $_GET[ 'Login' ] ) ) {
    $user = $_GET[ 'username' ];
    $pass = $_GET[ 'password' ];
    // Check against database
    // No rate limiting
    // No lockout
}จุดอ่อนของระดับ Low#
- ❌ ไม่มี rate limiting
- ❌ ไม่มี account lockout
- ❌ ใช้ GET request ทำให้ข้อมูลปรากฏใน URL และ history
- ❌ ไม่มี CAPTCHA
- ❌ ไม่มี delay ระหว่าง attempts
Medium Security#
// Some protection implemented
$user = stripslashes( $user );
$pass = stripslashes( $pass );
$user = mysql_real_escape_string( $user );
$pass = mysql_real_escape_string( $pass );
// Still vulnerable to brute forceระดับนี้เริ่มมีการ sanitize input แต่ยังคงเสี่ยงต่อ brute force attack
High Security#
// Token-based protection
checkToken( $user_token, $_SESSION[ 'session_token' ], 'index.php' );
// Anti-CSRF token requiredเริ่มมี token protection และ anti-CSRF mechanisms
Impossible Security#
// PDO with prepared statements
// Strong password hashing
// Comprehensive input validation
// Rate limiting
// Account lockout
// 2FA readyระดับนี้รวมแนวทางป้องกันที่สำคัญ เช่น:
- Prepared statements
- Strong password hashing
- Input validation
- Rate limiting
- Account lockout
- รองรับ 2FA
12. การป้องกันในทางปฏิบัติ#
ตัวอย่างการทำ Rate Limiting ด้วย PHP#
<?php
session_start();

// Check for failed attempts
if (isset($_SESSION['failed_attempts']) && $_SESSION['failed_attempts'] > 5) {
    // Check if lockout period has passed
    if (time() < $_SESSION['lockout_time']) {
        die("Account locked. Try again later.");
    } else {
        // Reset attempts after lockout period
        unset($_SESSION['failed_attempts']);
        unset($_SESSION['lockout_time']);
    }
}

// Check login credentials
if (login_failed) {
    $_SESSION['failed_attempts'] = isset($_SESSION['failed_attempts'])
        ? $_SESSION['failed_attempts'] + 1
        : 1;

    if ($_SESSION['failed_attempts'] > 5) {
        $_SESSION['lockout_time'] = time() + 900; // 15 minutes
    }
}
?>Web Application Firewall (WAF)#
ตัวอย่าง WAF Rule สำหรับป้องกัน Brute Force#
Nginx Example#
# Nginx example
limit_req_zone $binary_remote_addr zone=login:10m rate=5r/m;

location /login {
    limit_req zone=login burst=3 nodelay;
    # ... rest of config
}Apache mod_security Example#
SecAction "id:1001,phase:1,nolog,pass,initcol:ip=%{REMOTE_ADDR}"
SecRule IP:FAILED_LOGINS "@gt 5" "phase:1,deny,status:429,msg:'Rate limit exceeded'"13. Detection and Monitoring#
การวิเคราะห์ Logs#
ตัวอย่าง Failed Login Logs#
[2024-04-23 10:15:23] FAILED LOGIN - user: admin, IP: 192.168.1.100
[2024-04-23 10:15:24] FAILED LOGIN - user: admin, IP: 192.168.1.100
[2024-04-23 10:15:25] FAILED LOGIN - user: admin, IP: 192.168.1.100ตัวอย่างคำสั่งสำหรับ Monitoring#
# Count failed logins by IP
grep "FAILED LOGIN" /var/log/auth.log | awk '{print $NF}' | sort | uniq -c

# Real-time monitoring
tail -f /var/log/apache2/access.log | grep "POST.*login"Alerting#
ควรตั้งค่า alert สำหรับเหตุการณ์ต่อไปนี้:
# Failed logins หลายครั้งจาก IP เดียวกัน
alert: auth_failures > 5 within 60 seconds

# Login จากตำแหน่งที่ผิดปกติ
alert: country NOT in ["US", "CA", "UK", "TH"]

# Login นอกเวลาทำการ
alert: time NOT BETWEEN 09:00 AND 17:0014. Quick Reference#
Burp Suite Keyboard Shortcuts#
| Shortcut | Action |
|---|---|
Ctrl + I | เปิด/ปิด intercept |
Ctrl + F | Forward request |
Ctrl + D | Drop request |
Ctrl + Shift + I | Send to Intruder |
Ctrl + Shift + R | Send to Repeater |
Password Wordlists ที่นิยมใช้งาน#
| Wordlist | Size | Source |
|---|---|---|
passwords.txt | ~3,000 | John the Ripper |
rockyou.txt | ~14 million | Breach data |
10k-most-common.txt | 10,000 | SecLists |
Defense Checklist#
- ✅ ใช้ strong password policy
- ✅ ตั้งค่า rate limiting
- ✅ ใช้ account lockout
- ✅ เปิดใช้งาน 2FA/MFA
- ✅ ใช้ CAPTCHA หลัง login ผิดหลายครั้ง
- ✅ เปิด logging และ monitoring
- ✅ ตั้งค่า WAF rules
- ✅ บังคับใช้งาน HTTPS
- ✅ เก็บรหัสผ่านด้วย bcrypt หรือ argon2
15. Next Steps#
Congratulations! ตอนนี้ได้เรียนรู้และทดลองทำ Brute Force Attack Lab เรียบร้อยแล้ว
สิ่งที่ได้รับจาก Lab นี้#
- ✅ เข้าใจหลักการของ brute force attacks
- ✅ เรียนรู้แนวทางป้องกัน
- ✅ ฝึกใช้งาน DVWA
- ✅ ใช้งาน Burp Suite ในการวิเคราะห์ requests
- ✅ วิเคราะห์ผลลัพธ์จาก brute force attacks ได้
Recommended Learning Path#
- SQL Injection — การโจมตีฐานข้อมูล
- Cross-Site Scripting (XSS) — Client-side attacks
- Session Hijacking — การขโมย session
- OWASP Testing Guide — Security testing methodologies
- Secure Coding — การพัฒนา software อย่างปลอดภัย
Practice Resources#
| Resource | URL |
|---|---|
| OWASP Top 10 | https://owasp.org/www-project-top-ten/ ↗ |
| Burp Suite Documentation | https://portswigger.net/burp/documentation ↗ |
| DVWA Documentation | https://github.com/digininja/DVWA ↗ |
| Web Security Academy | https://portswigger.net/web-security ↗ |
| SecLists | https://github.com/danielmiessler/SecLists ↗ |
Ethical Considerations#
⚠️ IMPORTANT
- ทดสอบเฉพาะ systems ที่ได้รับอนุญาตเท่านั้น
- การ brute force โดยไม่ได้รับอนุญาตอาจผิดกฎหมาย
- ใช้ความรู้เพื่อ defensive purposes และ authorized testing
- รายงาน vulnerabilities อย่างมีความรับผิดชอบ
- ควรมีเอกสารอนุญาตก่อนดำเนินการ penetration testing
Legal Notice#
การเข้าถึง computer systems โดยไม่ได้รับอนุญาตถือเป็นความผิดทางกฎหมายในหลายประเทศ เนื้อหานี้จัดทำขึ้นเพื่อการศึกษาและควรใช้ภายใน lab environment เช่น DVWA เท่านั้น
Happy learning and stay ethical! 🔐